In this article, we’re going to talk about Sample Logic’s Vocal AI, not to be mistaken for Artificial intelligence. Here, the AI stands for ‘ Animated intelligence’ and is the 4th instrument in their ‘AI Series’.
This is what is exactly what I missing.
Check Out Vocal AI Here
[ez-toc]
Vocal AI Content
- There are 456 instruments & presets included
- Contains 5.5 GB Sample Content comprised of 24,153 audio files
- Features multi-sampled vocalists and choirs from around the globe
- Powered by a quad-core audio engine
- Step & FX Animators, LFOs, and XY Core Mixer allow for limitless motion
- Dynamic tag-based preset browser for ease of use
- Presets, sounds, and parameters can be randomized for instant inspiration
- MIDI patterns can be easily dragged and dropped into your DAW
- Includes interchangeable effects chain technology.
Check Out This Trailer & Listen To These Sounds!
Vocal AI Kontakt Instrument
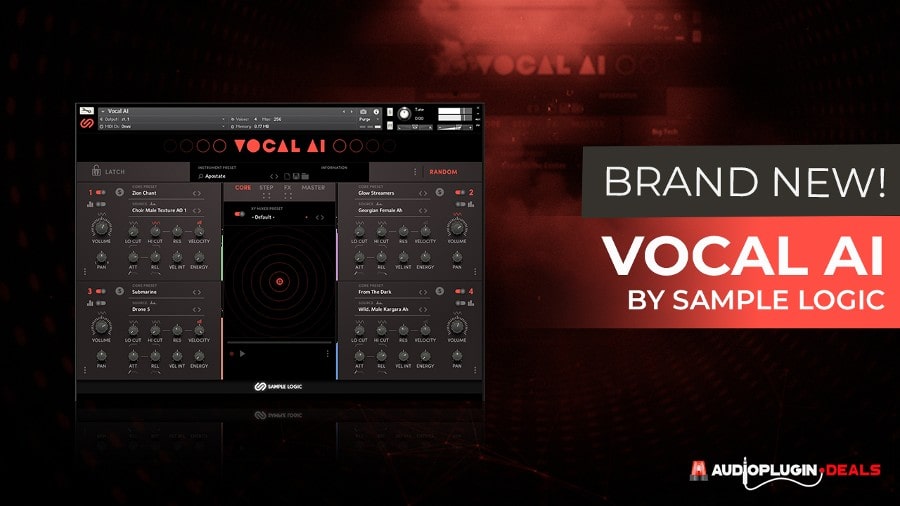
I love the way Vocal AI is laid out. For some, I do understand this could be intimidating looking at all the knobs, but I promise it isn’t. That said, let me give you a simple overview of what you’re looking at.
For starters, you’ll notice there are four tabs to choose from: CORE, STEP, FX, and MASTER.
- CORE is where the majority of your work will be done in terms of selecting and modifying presets and sounds.
- STEP is where you program patterns
- FX and MASTER is where you sculpt the sonics and character of your sounds
CORE: This Is Pretty Hefty Here
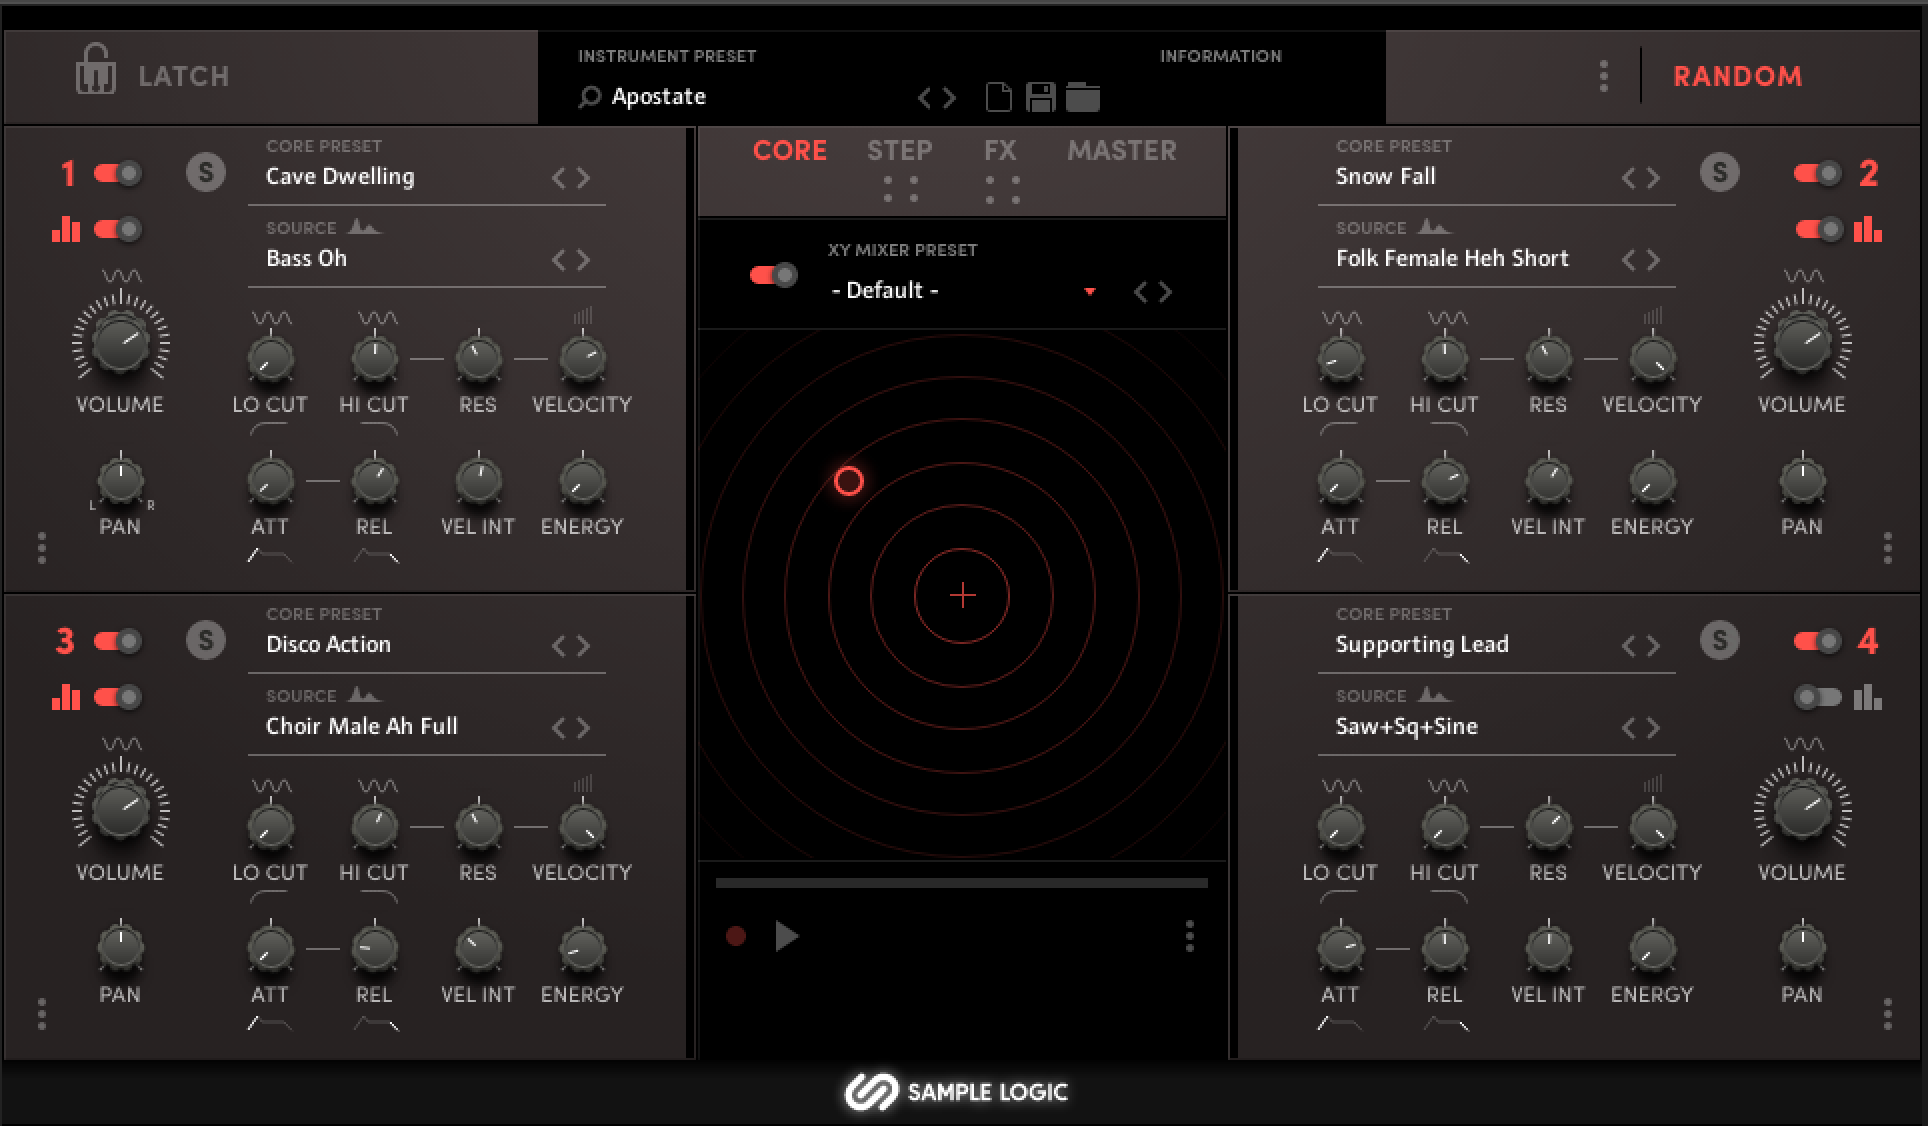
Core encompasses four quadrants, each labeled with a number 1,2,3 and 4. These are essential, the same in terms of function, so we’ll focus on one given what you do with one applies to the others.
Quadrant 1: Parameters and What They Mean
Core Preset: This is the preset title, which you can change using the arrow options < >
Source: This is the source sound that you’re playing, it can be changed, keeping the rest of the parameters intact.
S: Allows you to solo the quadrant. This is ideal if you only want to be selective over which quadrants you use. Or if you want to hear something in isolation. Or, you can click/move the slider next to the quadrant number to deactivate it altogether.
Step Editor: Located directly under the numeral and deactivation option. This allows you to step editor patterns for the said quadrant.
Volume: Controls the level of the overall preset
Pan: Controls the stereo image of the preset
Lo Cut and Hi Cut: These are two filters. Low removes the low end information from the sound. Hi cut removes the high end information from the sound.
Res: Stands for Resonance and embarks on the high frequency setting.
Attack: Governs how soon the sound comes in. Turning this knob counterclockwise will give a fading in sort of sound.
Release: Governs the ending of the sound and can sound like fading out
Velocity: Controls how much of the preset’s volume is affected by the velocity
Velocity Int: Stands for Velocity Intensity and determines how much of the input has over the presets overall volume when played.
Energy: This is a macro composed of Saturation, Compression, and Distortion.
That was a lot, and it’s the same exact for other quadrants as well. So once you understand one, you understand them all!
Randomize Settings
Randomization is a great feature, it’s where I live. I’m Bob Ross in this space, I love exploring, experimenting, and embracing ‘happy little accidents.’ On the surface, ‘Random’ is allocated to the core quadrant’s presets.
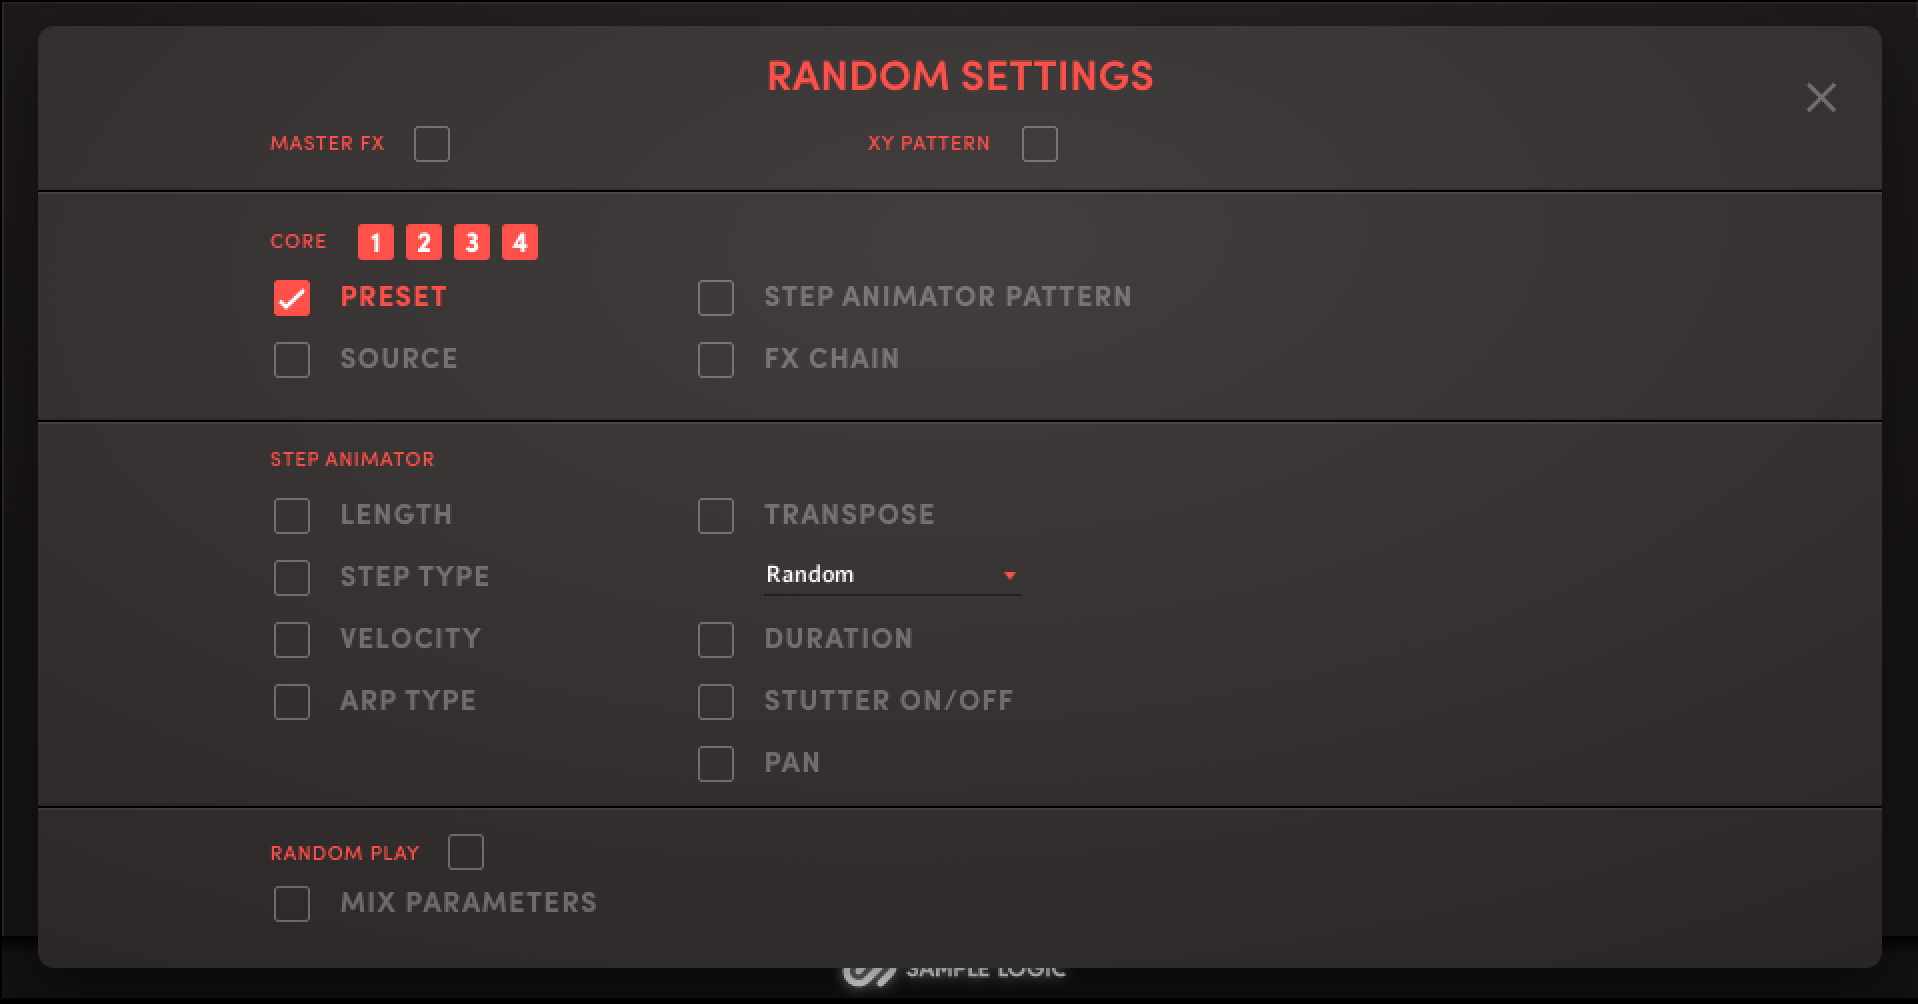
This is cool, however, if you look under the sink, you’ll have access and control over so much more:
- Core Preset
- Source Preset
- Step Animator Pattern
- FX Chain
- Mix Parameters
Look at the image above; there’s so much that can be explored here. Let’s look at what we have with step automation.
Step Automation: Length, Arp Type, Velocity, Stutter, etc. This section alone, in my opinion, is enough to keep you busy and creative for quite some time.
Using this section alone will help you avoid writer’s/creative block or other creative obstacles we face during the process of music production.
There are just too many different generative possibilities not to be able to spark good and interesting ideas.
Vocal AI Step Sequencer
This is magic in the making. You can control steps, speed, octave, etc, to play patterns when you trigger patches via your MIDI Controller or program MIDI data into your DAW’s sequencer.
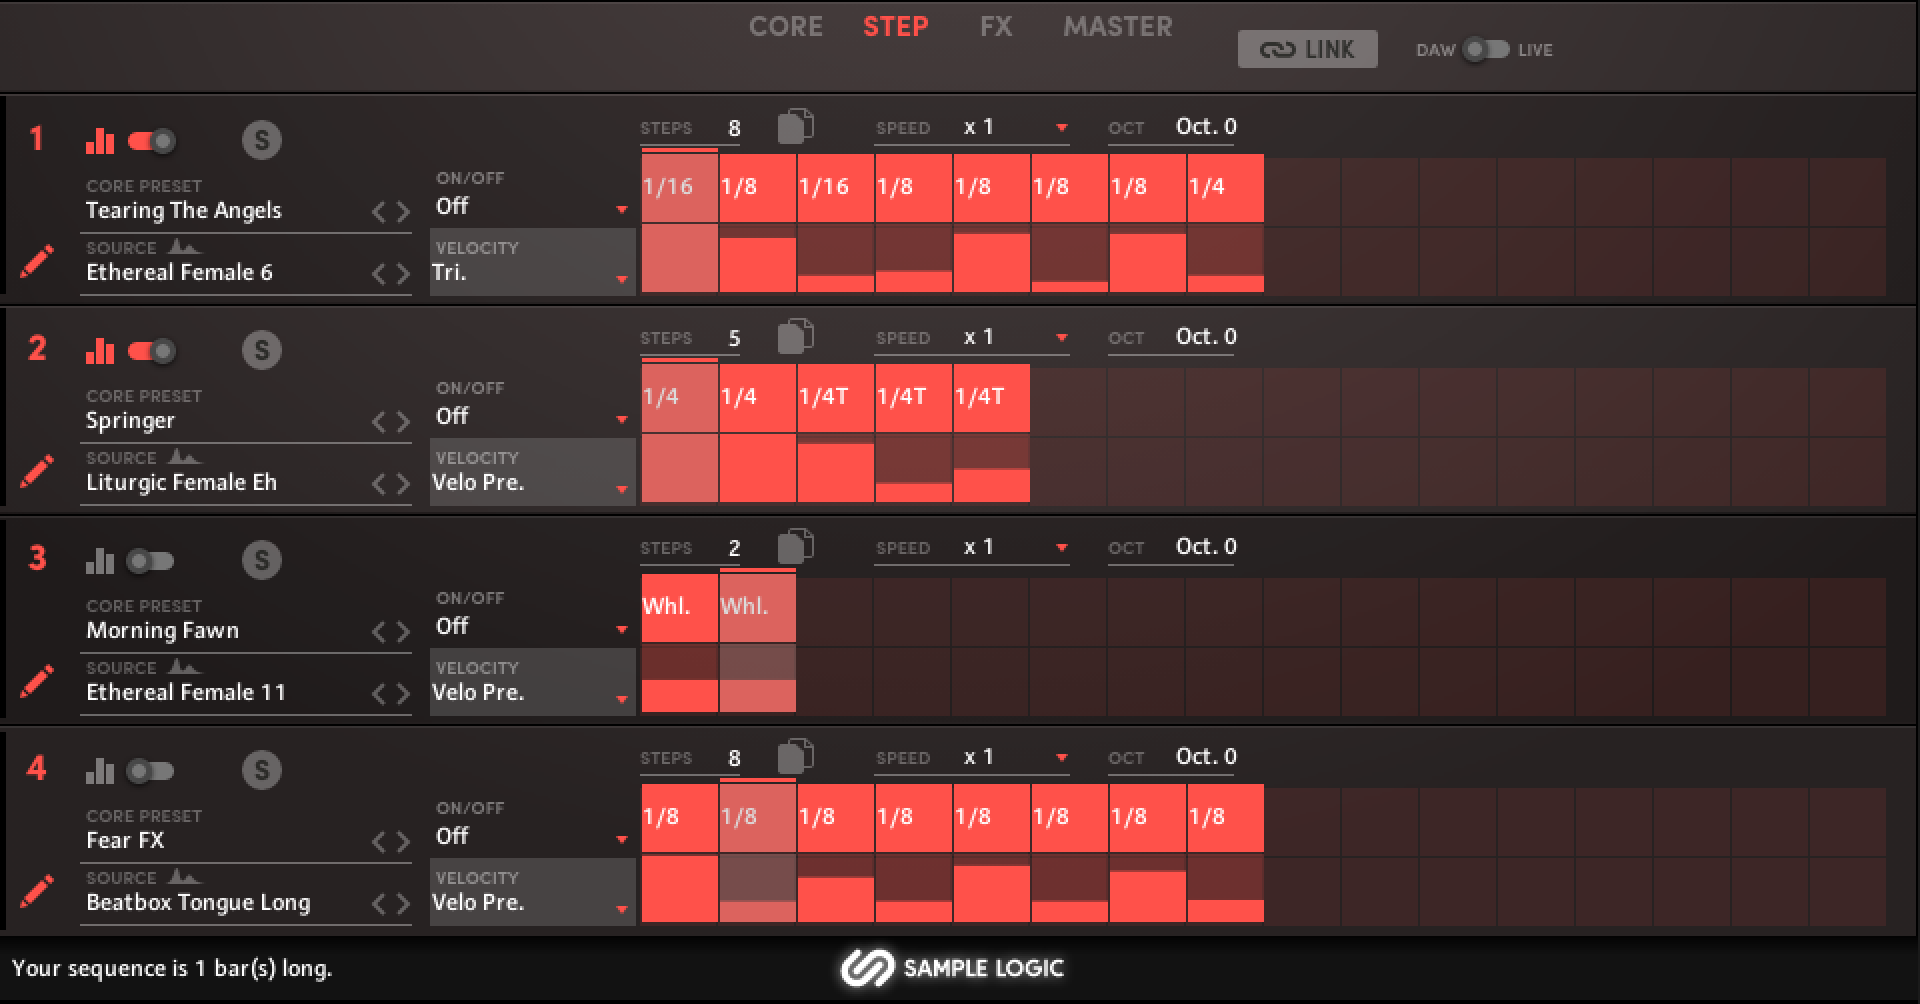
Utilizing a step sequencer becomes extremely beneficial when creating drones or repetitive ambient elements within your composition or beats. It can also be a great way to kick start ideas.
Things get cooler, though. If you click the pencil on any Quadrant/Core you have more parameters you can tweak, including MIDI Drag and Drop!
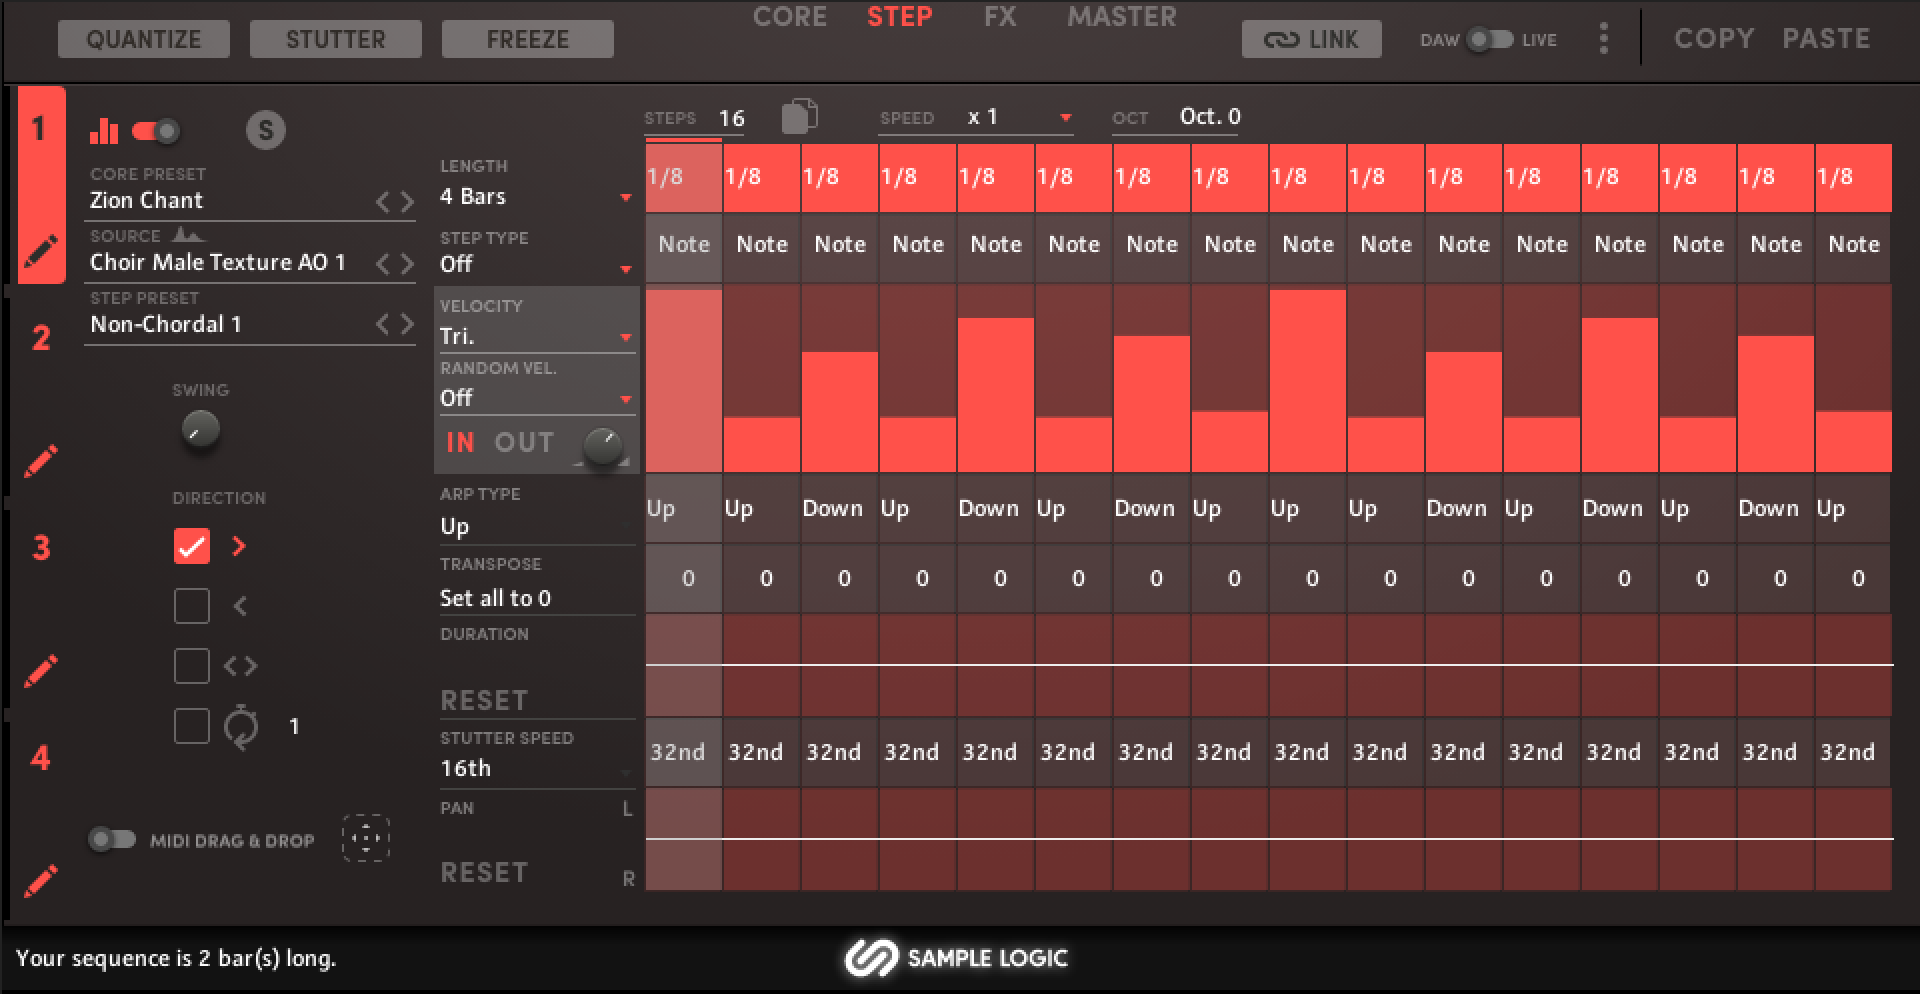
You’ll see the option down at the bottom left of the window. Enable it, then right the direction trigger to your DAW. From here, you can reassign sounds or manipulate the MIDI information in any way you like.
Vocal AI FX and Master Sections
These tools can be collectively referred to as essential audio processing effects in music production. They help shape the sound, add character, and create depth and spatial perception in a mix, resulting in a polished and captivating musical experience.
Vocal AI comes with a collection of essential processing fx that help you shape each quadrant that collectively shapes the overall character of your patch/preset.
A simple breakdown of a few processing effects, if you’re unfamiliar
Compression: Controls the sound’s dynamics.
Saturation: This introduces harmonics and warmth, it can be very tasty sounding.
EQ: Short for equalizer or equalization, allows you to boost or cut frequencies from the sound, in this case, the voices.
Reverb: Simulates space, like rooms, halls, etc., of various sizes. It’s used to make things sound more realistic and, at times, depending on the use, add depth.
Delay: This is a time based effect, like reverb, but this effect allows you to control the repetition of the sound and can be used to add rhythm or create an echo.
Each effect can be tweaked and come with presets!
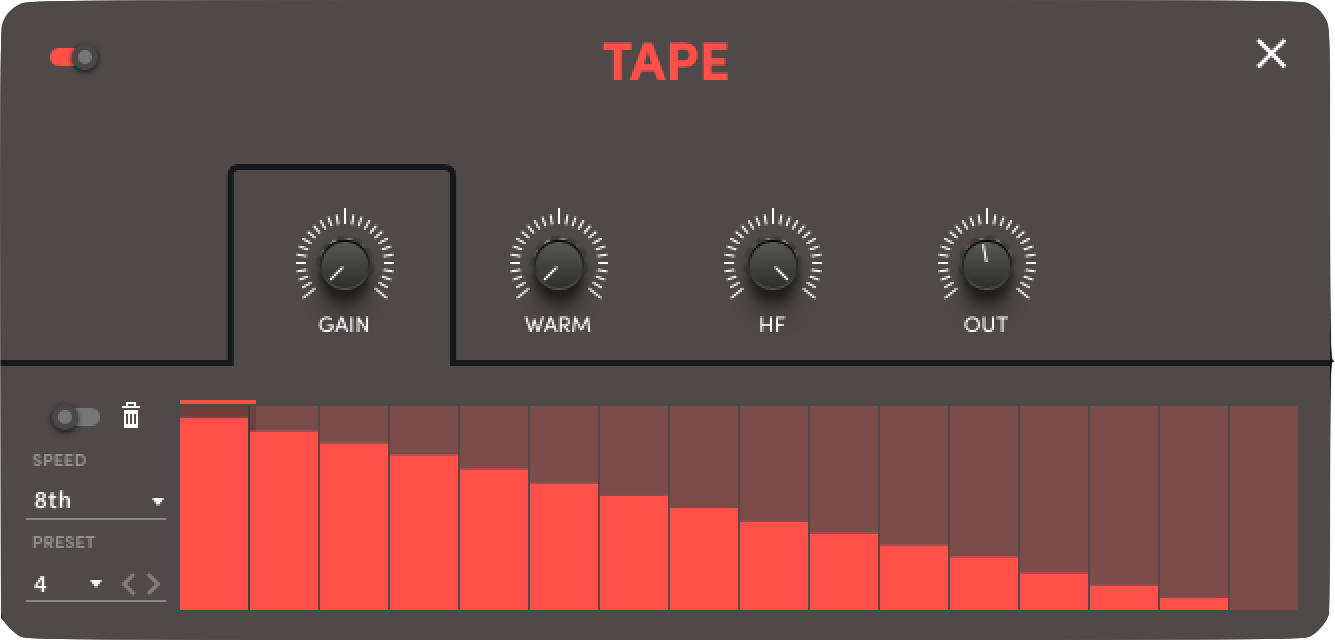
Look at this Tape Fx for an example. Simple, tweakable parameters
All of these effects can be used to further enhance the stock presets and really make them fit the way you need them to.
XY Mixer: What It Does
This feature can look a little intimidating if you’ve never used a synth containing the feature, but let me briefly address what it is and how it can be of benefit to you.
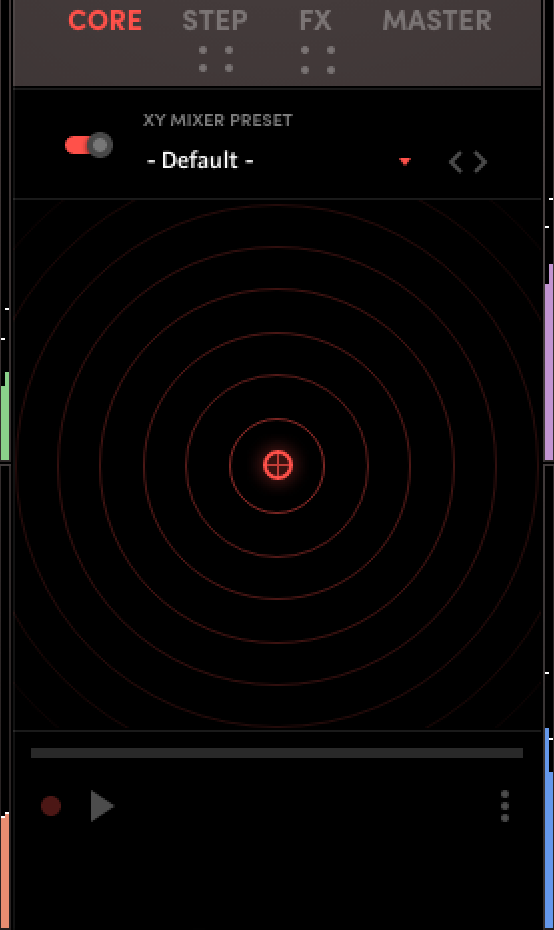
This allows you to dial in the mix of all 4 quadrants as a whole in a unique fashion!
The center dot, when straight up, will play quadrants 1 and 2, omitting 3 and 4, and vice versa.
With that said, you can focus the dot or focal point anywhere and even have it automate between the quadrants.
The Play Button: When enabled will run through patterns governed by the presets you select while you trigger notes on your MIDI Controller.
Record: Hit record, hold down a chord (just an example) and move the focal point in any pattern/path of your choosing. Now when you hit play and trigger notes, the mixer will follow your custom pattern.
Moving the focal point without enabling Play/Record will result in a static mix of the quadrants.
Vocal AI Presets
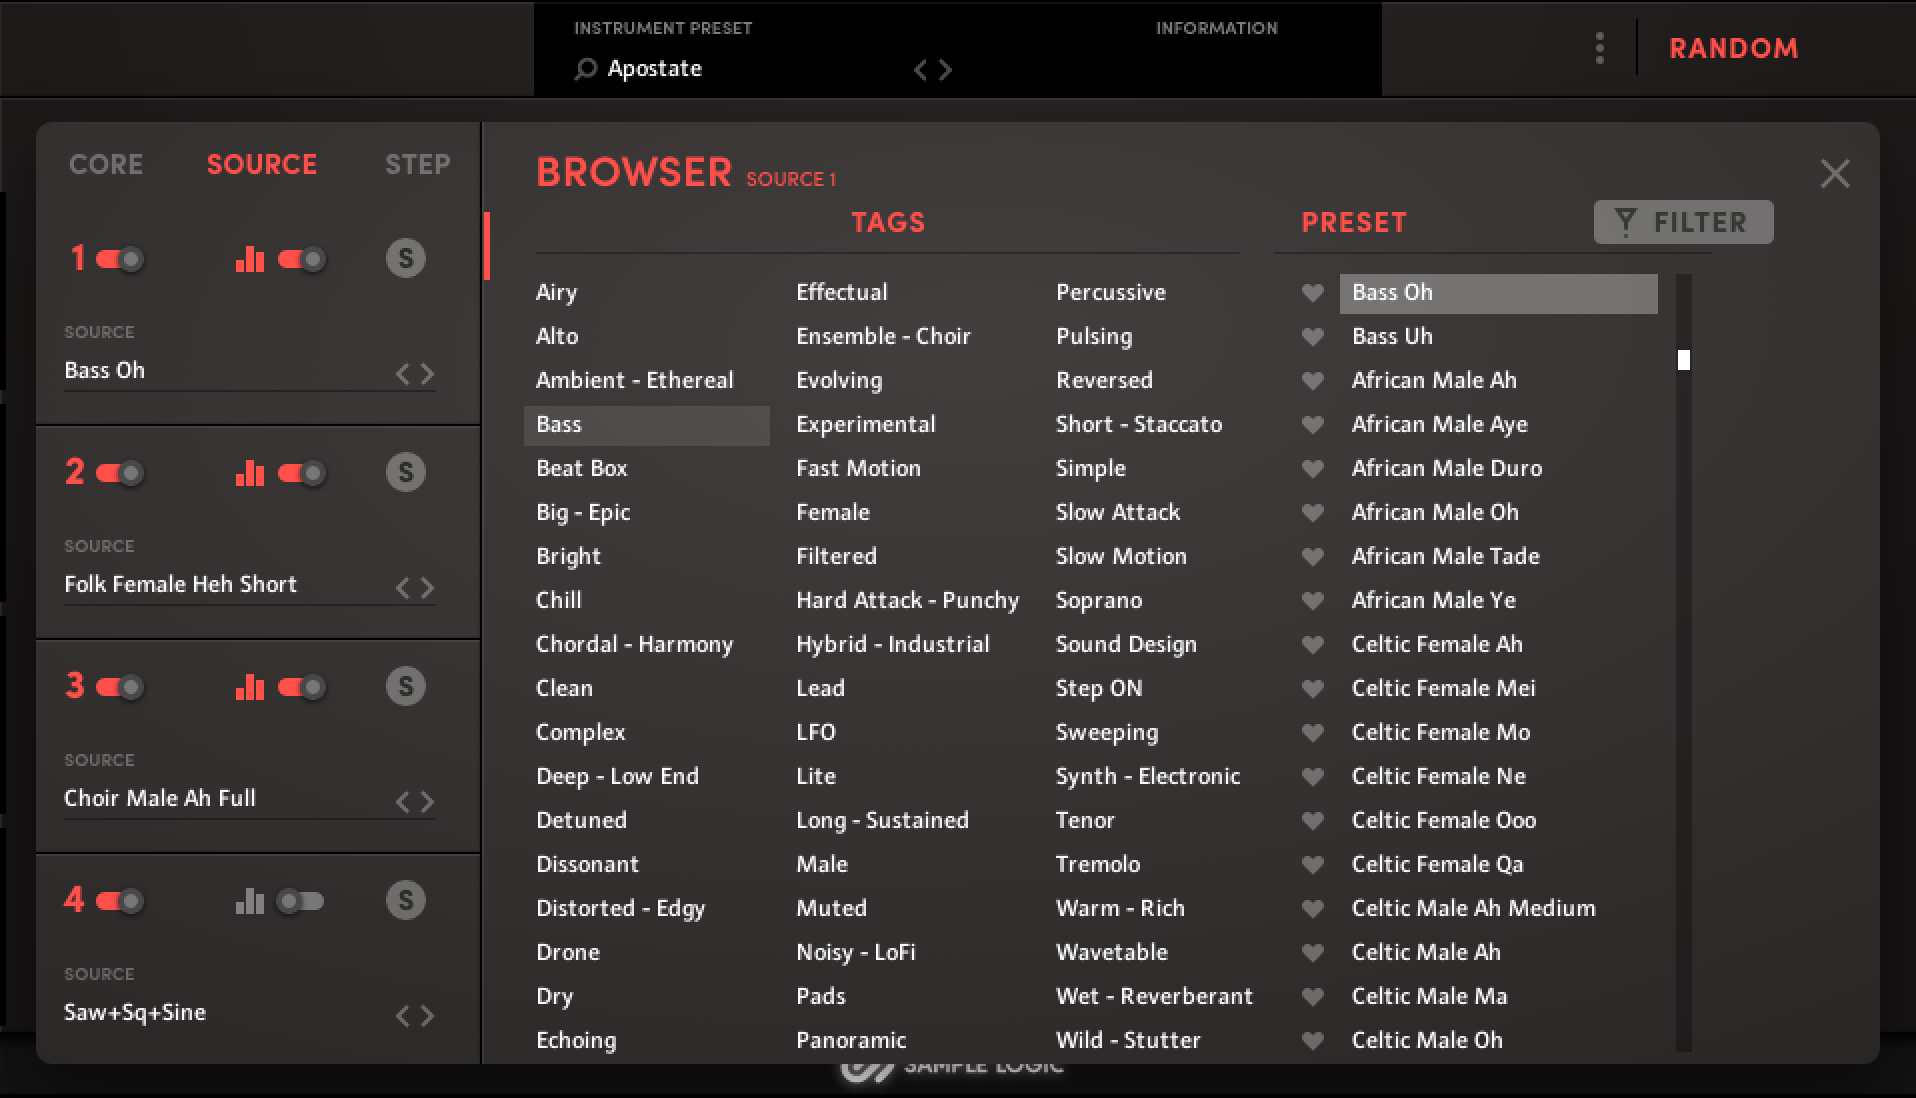
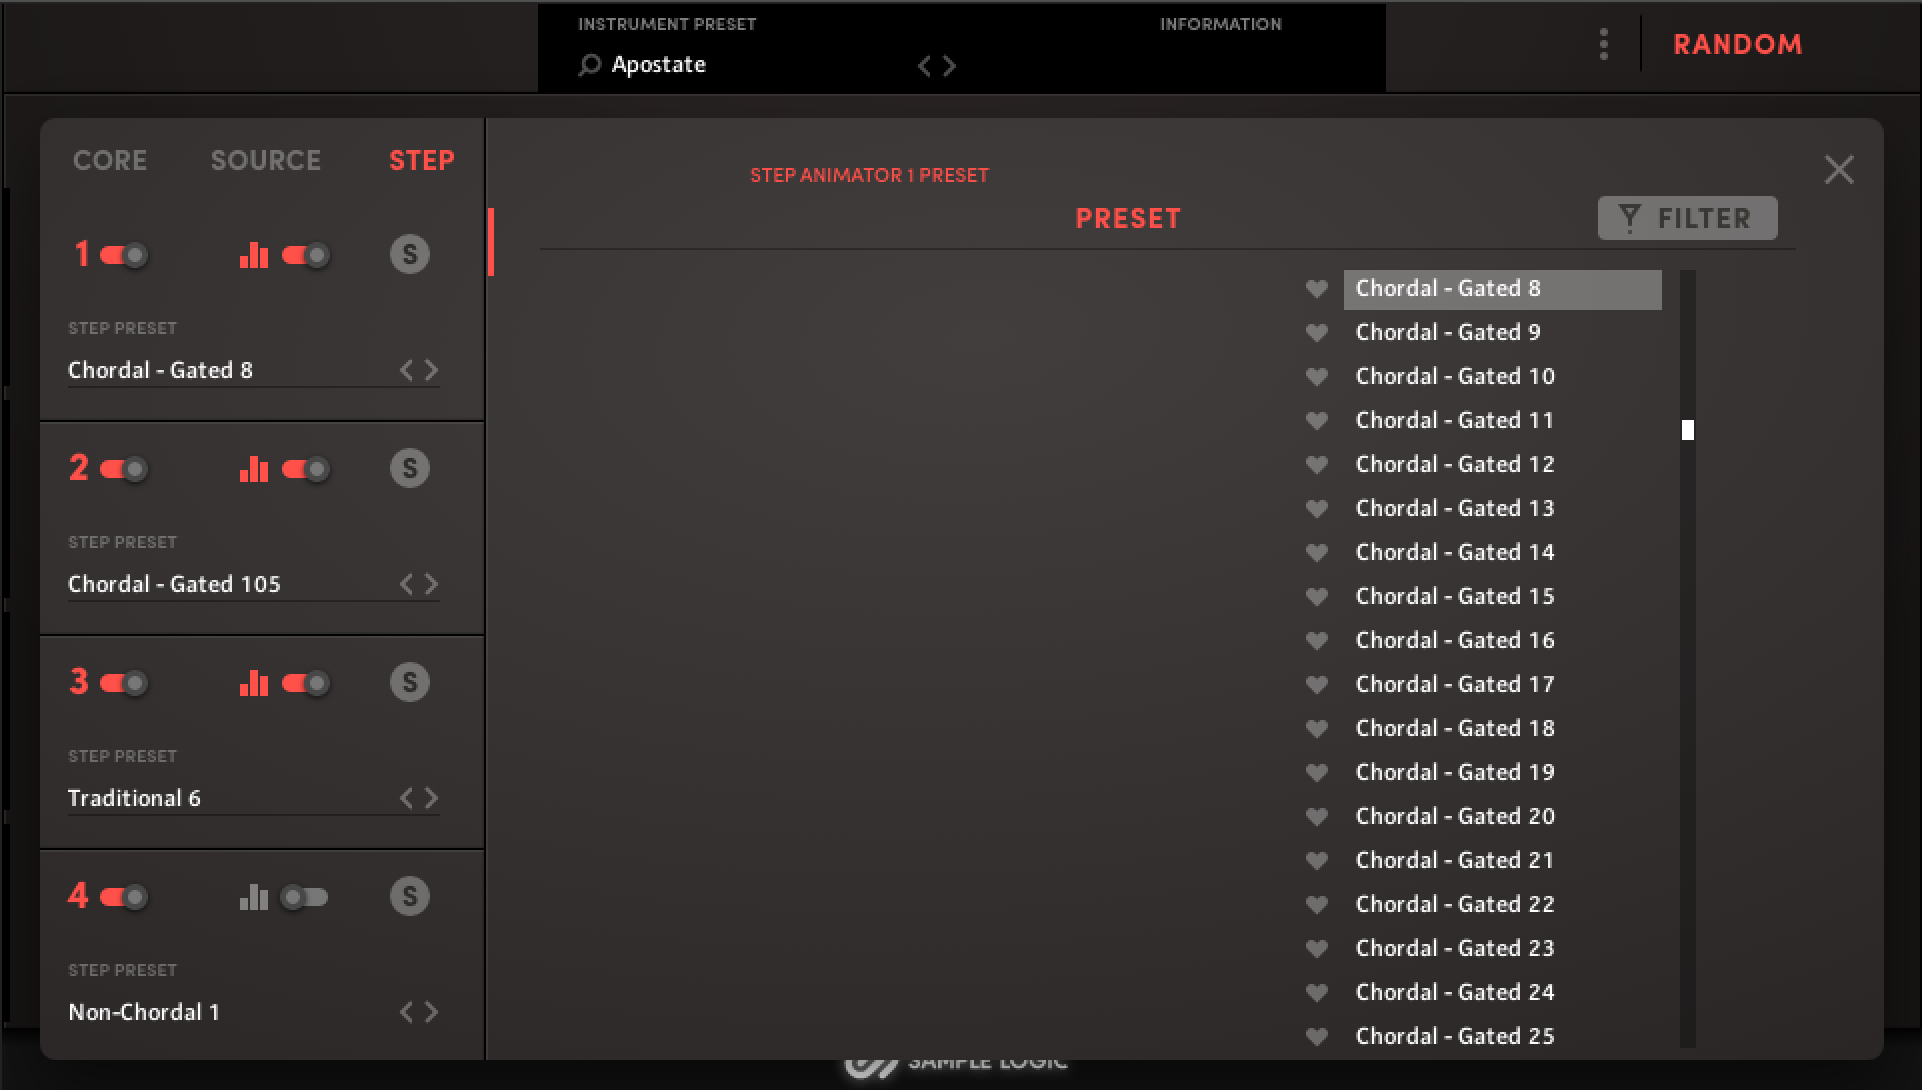
Lots of nice sounding presets and sources to choose from. I love the filtering/tagging option making it easy to browse sounds meeting specific criteria. I also like the idea of being able to tag or heart/like the sources and presets.
Bringing It All Together…
Sample Logic knocks it out of the park with another great sounding Kontakt Instrument. If you’re a fan of Sample Logic’s previous AI instruments: Synth, Symphonic, and World AI, you’ll love Vocal AI.
Heck, even if you’ve never tried the other installments but need a flexible vocal library, this is the one. It’s packed with a lot of good presets with tons of manipulation capabilities.
