Are you ready for a new Tape Machine? If so, check out Tape Face V3!
[ez-toc]
What Is Tape Face?
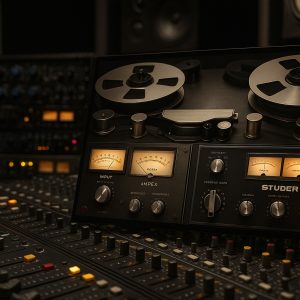
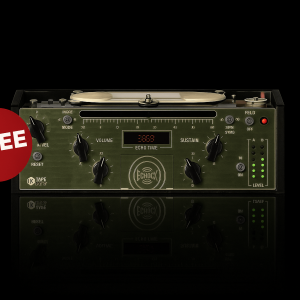
Tape Face is a tape emulation plugin by Kiive Audio based on the Scully 280-B tape recorder. It’s a great option for adding analog-styled warmth and unique character to your music. In a clean-sounding world (musically), sometimes you want a less sterile and more realistic sound.
This is that mojo, that extra oomph, that something that most music is missing, and unless you’re using analog or analog processed sounds, the only way to get it is with good-sounding emulations.
Where To Use Tape Face?
I took the advice from Kiive Audio and immediately placed it on my master channel as well as on various other channels just to see how it would affect my mix, using its default settings.
Those channels include
Mastering Bus: I chose to start with the master bus to immediately hear how the plugin was affecting my overall mix. I found the glue to work very well, even when the sounds weren’t from the same source.
Drum Mix Bus: This was magic, as Tape Face, especially using the Red/White Reel (default selection), as it gave my drums a little movement
Individual Drum Shots: All 3 reel selections work well on individual drums, depending on what you’re going for and how you want each drum shot to sound. Find the reel characters below in the Tape Mode Section.
Brass Instruments: The saturation added by Tape Face works very well for brass shots and aggressive horn lines. I found the Blue and Grey reel option to work amazingly well. Both at taming the aggressive distortion I had but making the brass sounds fat at the same time.
While experimenting with the three different Tape Modes that it offers.
3 Different Tape Modes
Red/White Tape Reel: This reminds me of Tape Face V2. In fact, it may be the exact same. It adds minimal distortion and saturation and has a pumping-like sound depending on what you have it on (channel-wise). I noticed a slight flavorful pumping when using Red/White on my drums.
Blue Tape Reel: I found the blue reel setting to sound quite smooth as it doesn’t sound too harsh or too dark in its sound character. I enjoyed using it on my drum bus as well well as brass instruments, lower register pianos, guitars, and strings.
Perfect amount of high-end shine, low-end growl, and saturation to push the sounds out of their comfort zone without getting too crazy.
Grey Tape Reel: The grey reel is the darkest sounding of the 3 options. You’ll find the highs are removed from the sound, muffled/muddy, but in a good way. I find this very useful for taming sounds and or tucking them in the mix.
Tape Face Features To Love
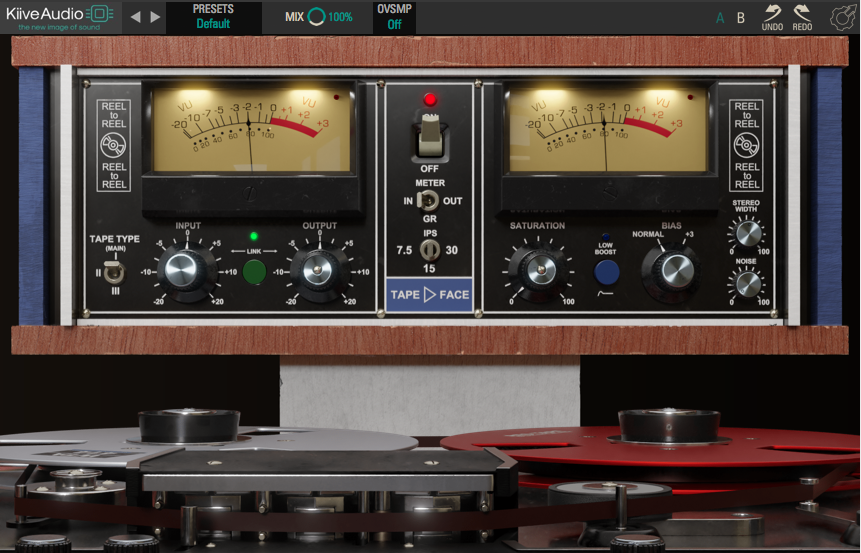
Input/Output: Allows control over the input and output. Push and increase the input for more saturation.
Link: Use the link function for automatic gain compensation
On & Off: Use this option to bypass the plugin. This is ideal when you want to A/B unprocessed vs processed version of your audio.
IPS: This controls the speed at which the tape spins. The options available are 7.5, 15, and 30
Saturation Knob: This is the control we were missing in Tape Face V2. Each tape section has a different saturation flavor.
Bias: Set to +3 for saturation that includes more low mids
Low Boost: This feature, once activated, reintroduces low frequencies information that’s attenuated when using saturation
Stereo Width: This feature increases or decreases an audio signal’s stereo field. This is great for controlling reverb and delays. Yes, that’s right, tape machines placed on time-based fx can be lovely.
Watch The Tape Face Overview and Listen Closely

Avoid the Mistake I Made
I got so excited about downloading the plugin that I installed the wrong version, V2, instead of V3. Notice in the screenshot that it says ‘M1 Compatible version’. This does not mean Tape Face won’t work if you have an older chipset.

Even if the installer says ‘M1 installer’, this is the version you’ll need to install if you want access to the newest features.
Conclusion
I’m still putting the Tape Face through its paces, but so far, this is something special. It’s not too subtle or aggressive, and I really love the fact that each tape mode utilizes the features differently. It’s like having 3 tape machines in one!
About Author: Greg Savage is a music producer/sound designer with 20+ years of industry experience. For information on sync licensing and mentoring, please visit https://www.diymusicbiz.com/
